This article explains how tags function within the Class Document Management System (DMS). It covers:
Tag Categories
There are six categories of tags available in the Fund Documents screen:
- System - Pre-defined tags created by Class includes Financial Years, report names and other. For a complete list refer to the article here.
- Custom - User-created tags shared across the entire Business. Manage Custom Tags section provides instructions on how to add custom tags.
- Investment - Tags for all investments activated in an entity, it includes suspended investments but not deleted.
- Member - Tags for all current and former members in a Fund.
- Account - Tags for all the activated member accounts including accumulation and pension accounts.
- Locked - Automatically assigned by the system. It can't be removed or edited.
Locked Tags
Documents with a lock icon are locked documents. These are typically created via:
- Business transaction events
- Fund/client messaging
- Integrated third-party sources(e.g. RP Data Cotality reports, Actuarial provider documents)
Locked Tags are assigned automatically by the system hence greyed out on the document details screen and cannot be edited or removed. Additional Tags from another category can be added to locked documents.
Tag Documents
Navigate To Fund Level> Fund > Fund documents > View/Edit
When a document is uploaded to the DMS you have the option to click Save and continue to open the View/Edit screen. You can also access the View/Edit screen from the document list to update Tags for an existing document.
Type in any letter to begin searching for the tag and select as many tags from the categories (System, Custom, Investments, Members and Accounts)
Click on the x, this will remove the tag from the document.
A locked tag is greyed out in document details screen and cannot be manually added/edited or deleted from the Fund document screen.
Updating Tags in Bulk
- Only the first document displays the checkbox Apply tag changes to all documents (disabled by default).
- Adding or removing a tag on this first document enables the checkbox.
- Add or remove the desired tag(s) on the first document.
- Tick Apply tag changes to all documents.
- Select Save all and finish or Save and next.
When applying bulk changes, locked tags are protected and will not be removed.
Manage Custom Tags
- Are visible across all entities in the Business
- Display in order of creation date
Navigate To Fund Level> Fund > Fund documents > Tags > Manage custom tags
- Select Tags, and then click on Manage Custom Tags.
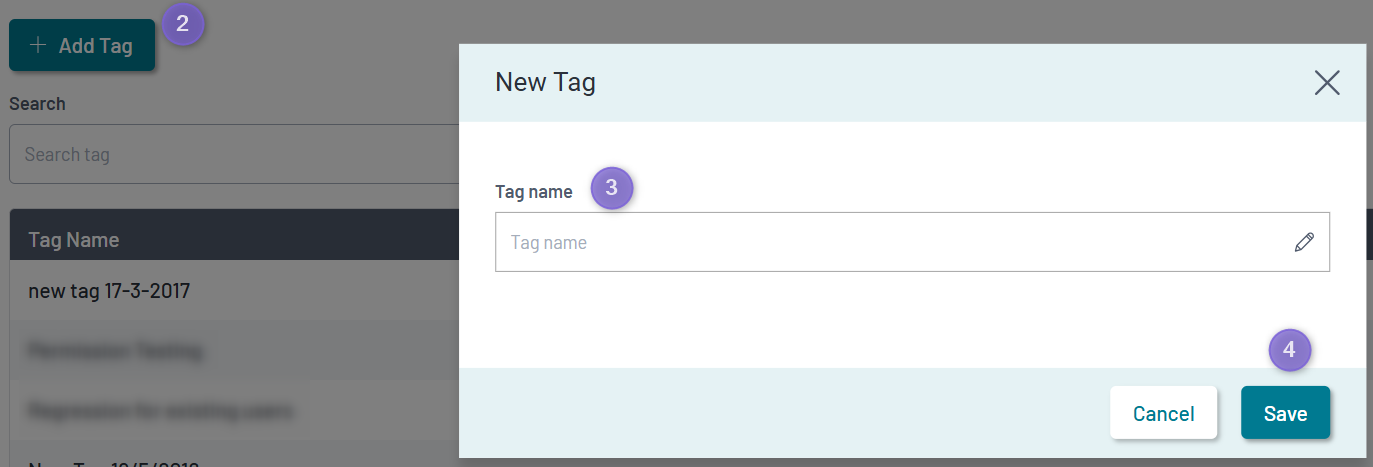
- Select Add Tag.
- Type the Tag name on the New Tag.
- Click Save.
Edit Custom Tags
Navigate To Fund Level> Fund > Fund documents > Tags > Manage custom tags
- Search for the tag name you want to edit.
- Select the Menu icon on the right
.
- Click Edit.
- Enter the updated tag name in Edit Tag.
- Click Save.
Delete Custom Tags
Navigate To Fund Level> Fund > Fund documents > Tags > Manage custom tags
To Delete a Custom Tag:
- Select Tags, and then click on Manage Custom Tags.
- Search for the tag name you want to delete.
- Select the Menu icon on the right
-
To download the Excel Transaction Loader file Click Delete.
If the tag is still attached to documents, remove it from those documents first.
Search Fund Documents by Tags
Tags are the primary filter mechanism used for searching fund documents.
To search using Tags:
Navigate To Fund Level> Fund > Fund documents > Tags
- Select Tag(s) from across the tag categories (System, Custom, Investment, Member and Account).
- or you may type in the tag name if you like.
- Select Clear to remove tags selection criteria or x to remove the tag name from the filter criteria.
The Tags filter result set will list tagged documents that contain all the selected tags.
What's Next?
Find out about Source and Status in the Document Management System here.